
Wednesday, November 16, 2011
Painting Flames of War Goums (V): The horde
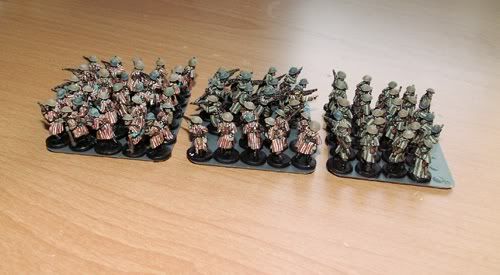
I have painted allready all the Goumiers of the army. A hard work, djellabaes need a big amount of time to be well painted.
Thursday, November 10, 2011
Painting Flames of War Goums (IV) The abbey
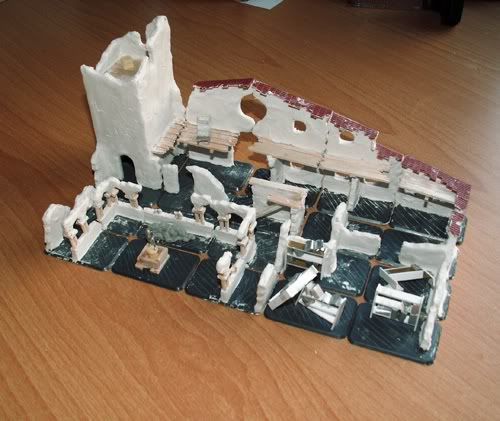
I continue working in the Goums Platoon, making the bases terrain.
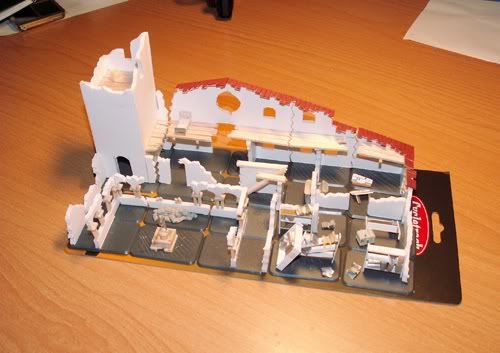
In the last days I have applied the textures on the walls with DAS putty. I’m very proud of the result. I like specialy the cloister and the library. I made the shelvings with an old plastic card and the cloister statue with Peter Pig naked woman which I covered with some clothes to represent Eva taking the apple.

In the last days I have applied the textures on the walls with DAS putty. I’m very proud of the result. I like specialy the cloister and the library. I made the shelvings with an old plastic card and the cloister statue with Peter Pig naked woman which I covered with some clothes to represent Eva taking the apple.

Saturday, November 5, 2011
Painting Flames of War Goums (III) The Abbey
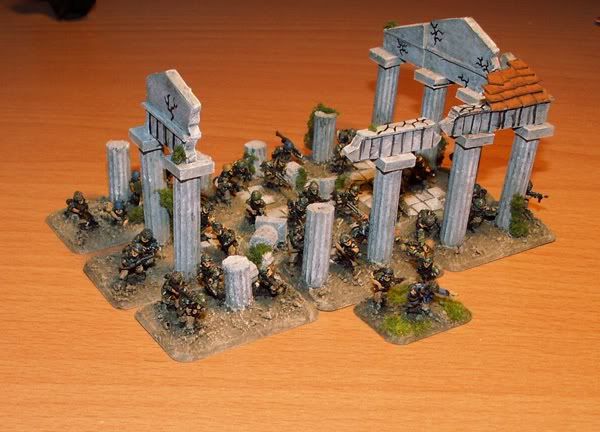
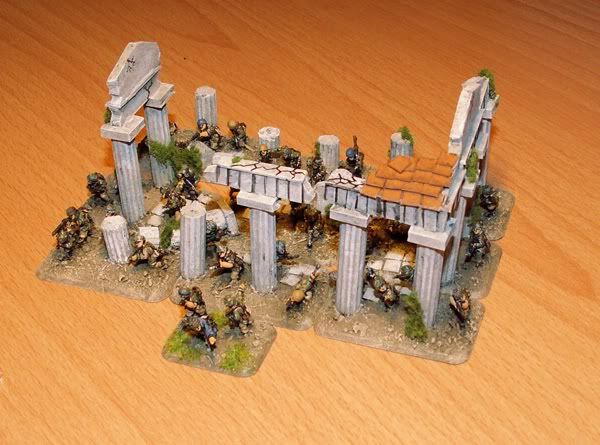
When a I began this comision job I decided to de a great terrain work. The customer said me that he wanted this army specially to play battles in Italy. I began thinking how to create a unique army, and finally inspiration came to me with the abbey. There was hundred of abbeys in Italy, so it would be great give the army the italian appeal he wanted.
So I have began working on it, creating a diorama-style army, with two objectives included in the scene.
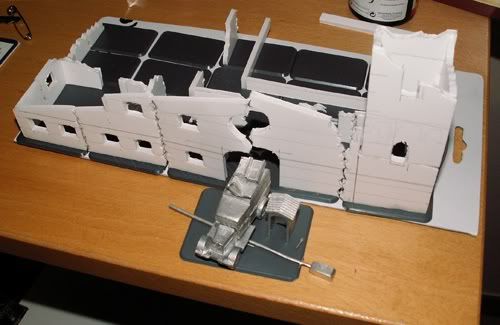
It will be a very nice abbey, with a garage, dining room, library, kitchen, cloister and a destroyed tower. Every team will be individual, buta ll togheter will be as a diorama, something similat to what I did with Fallschirmjagers platoons. I’ll post mor advances son.
Wednesday, November 2, 2011
Painting Flames of War Goums (II)
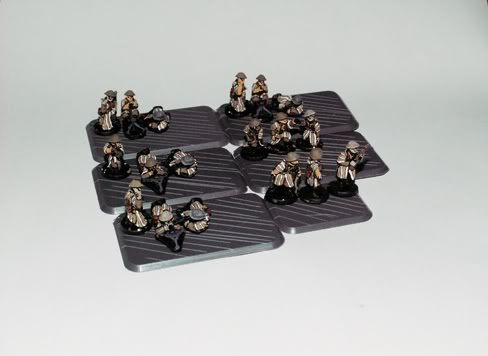
I just ended painting my first Goums platoon: the weapons platoon. Its very difficult to paint the lines of the djellabas, probably the hardest pattern I ever painted. So much and so thin…
The position of the miniatures is not definitive, it’s only to organize my work.
The position of the miniatures is not definitive, it’s only to organize my work.

Friday, October 28, 2011
Painting Flames of War Goums
I have received a comission job to paint some platoons of Flames of War Goums.
Here you can see the three patterns I'm using to paint the Djellabas
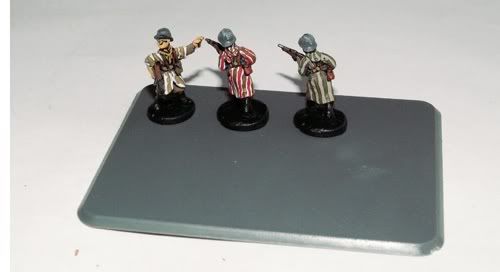
I'll use in this army more modular terrain in the bases, it will be a very spectacular army!
Here you can see the three patterns I'm using to paint the Djellabas

I'll use in this army more modular terrain in the bases, it will be a very spectacular army!
Tuesday, October 18, 2011
Mediterranean Fallschirmjagers IV
Hi!!
My Fallschirmjagers are almost finished. You can see some pictures of the first platoon here :)

And finally, the platoon disordered, like in gaming table.
My Fallschirmjagers are almost finished. You can see some pictures of the first platoon here :)


And finally, the platoon disordered, like in gaming table.

Monday, October 17, 2011
Mediterranean fallschirmjägers III
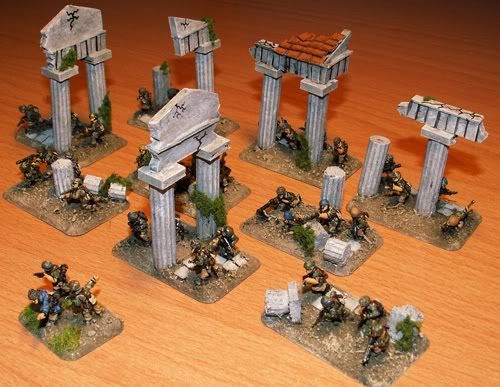
The work with fallschirmjägers continues. I have applied DAS putty on the bases and I have ended the ruins. Some column drums on the ground, parts of the frieze on the columns... All done with foamboard and cardboard.


Sunday, September 25, 2011
Mediterranean Fallschirmjägers II
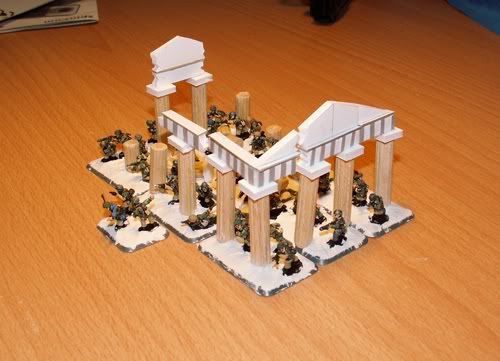
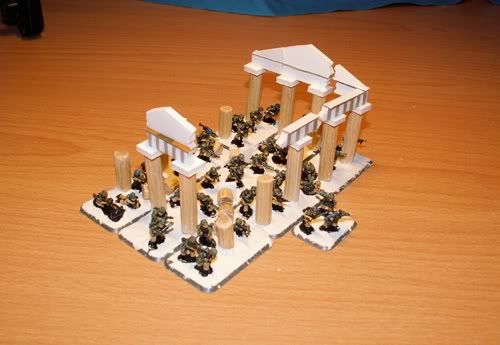
The work with the Fallschirmjägers continues!! By the moment I have painted both platoons, glued the miniatures on the bases and I have put the columns. A pair of photos!


Thursday, September 15, 2011
Mediterranean Fallschirmjägers
Im ejoying my Erasmus year in Sweden but it doesnt mean that I stopped painting. I just have began working in a new project last week. I have never painted a fallschirmjägers army, so I want to do it and, by the way, try a new form to do scenery in the Flames of War bases.

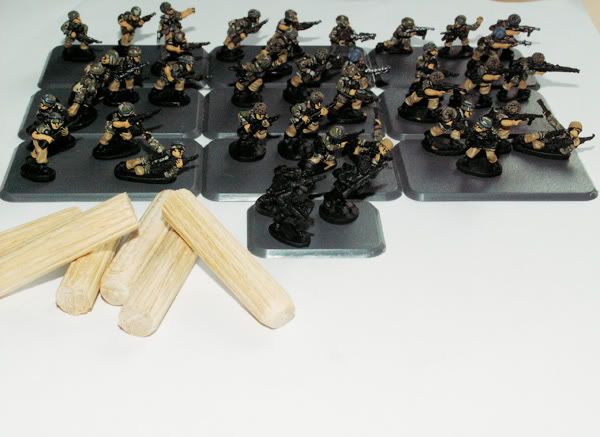
Some of the fallschirmjägers. Camouflage shirts and yellow ochre pants.
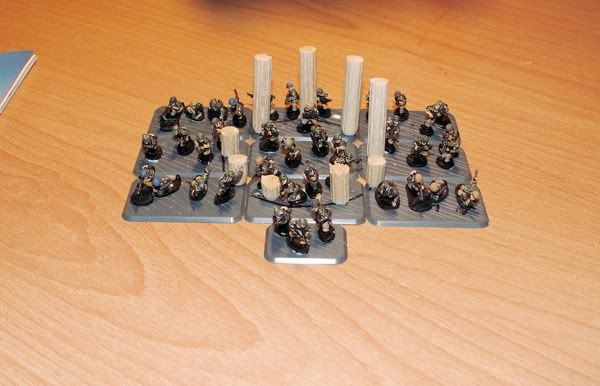
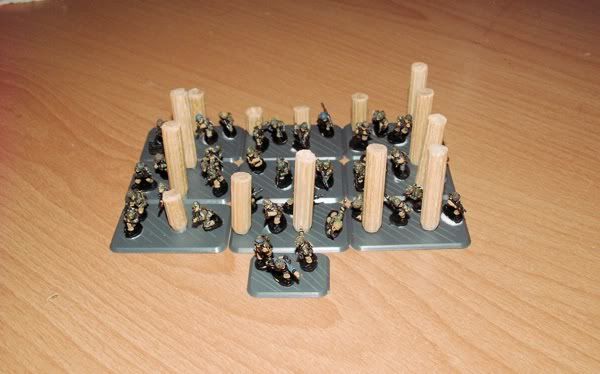
This new form of bases scenery means that the the scenery of the whole platoon will be part of a more complex and big scenographic element where all the bases are involved.
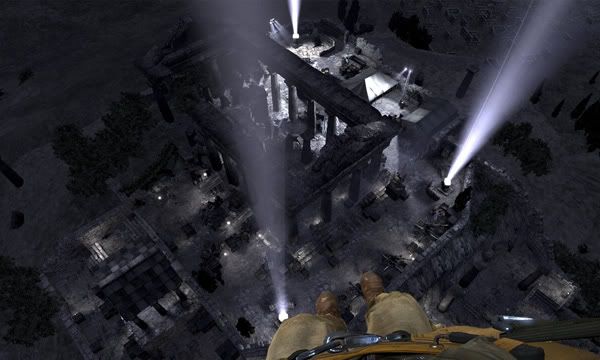
Fallschirmjägers and lined wooden sticks... any idea of what could it be?
I want to leave a clue...

Some of the fallschirmjägers. Camouflage shirts and yellow ochre pants.
This new form of bases scenery means that the the scenery of the whole platoon will be part of a more complex and big scenographic element where all the bases are involved.

Fallschirmjägers and lined wooden sticks... any idea of what could it be?
I want to leave a clue...

Friday, September 9, 2011
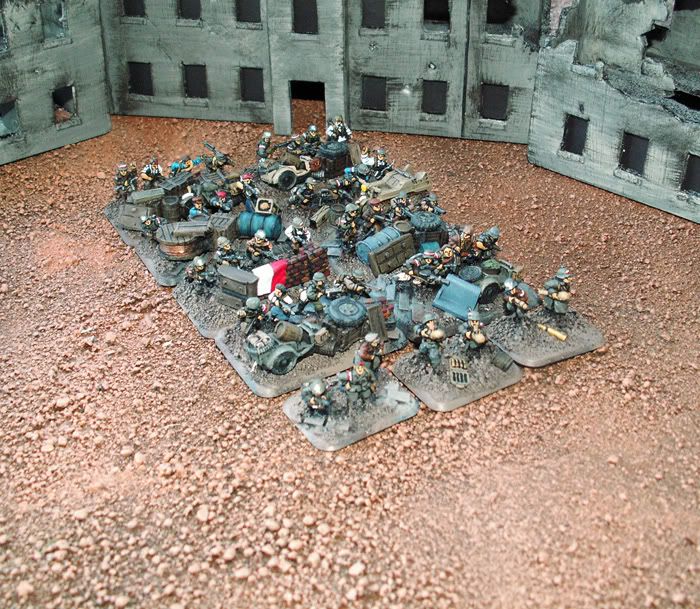
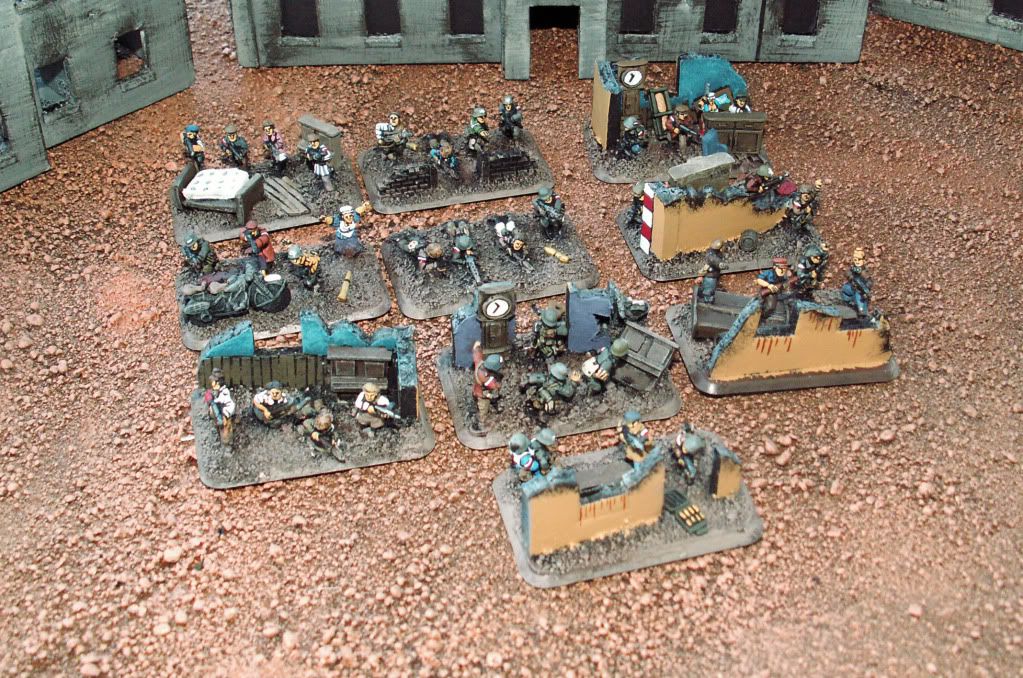
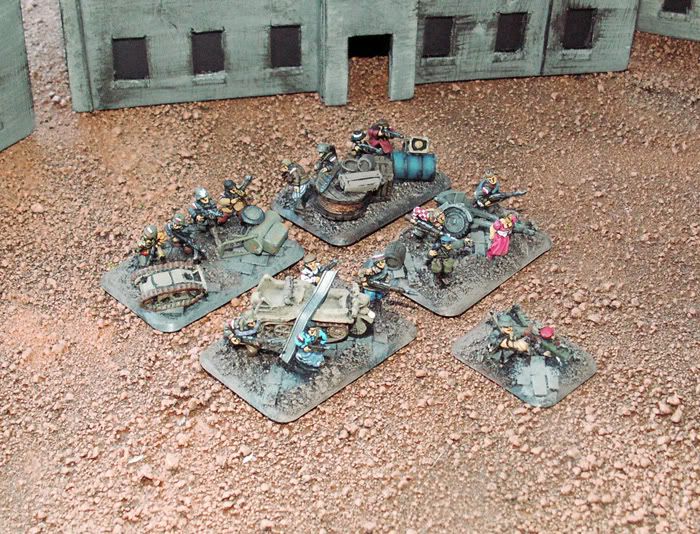
Armia Krajowa - Terminado
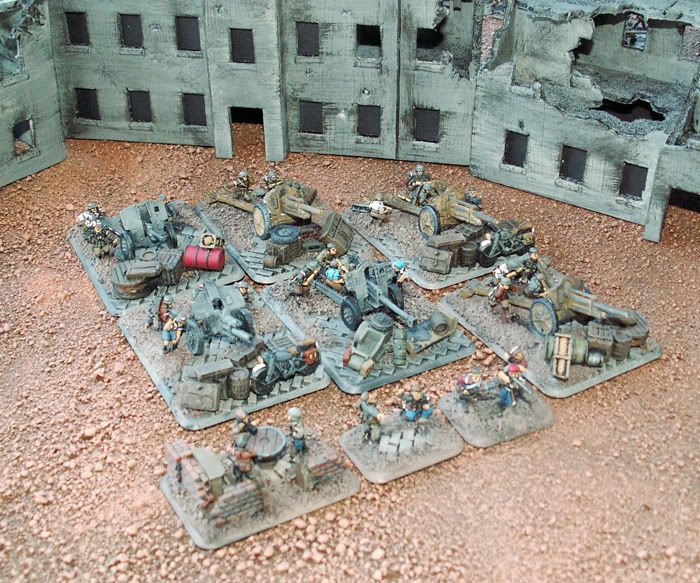
Finalmente terminé el Armia Krajowa. Ya está enc asa de su nuevo propietario y está muycontento con él. Pongo unas fotos para apreciar los detalles de este durísimo trabajo de pintura y modelismo.
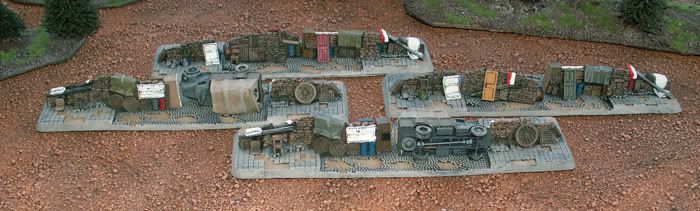
Barricadas
El HQ
MG’s
Morteros
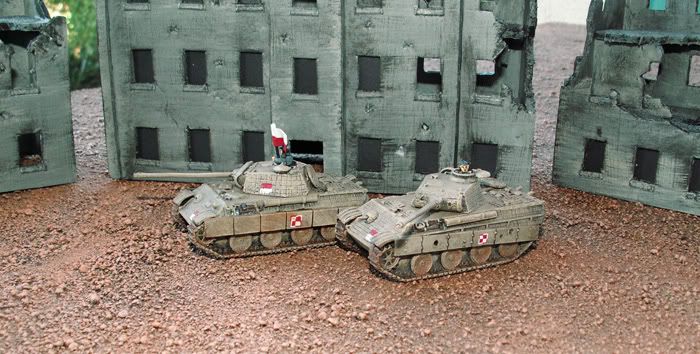
Panthers Capturados
AT’s

Artillería
Infantería
Barricadas


El HQ


MG’s

Morteros

Panthers Capturados

AT’s

Artillería

Infantería


Thursday, August 25, 2011
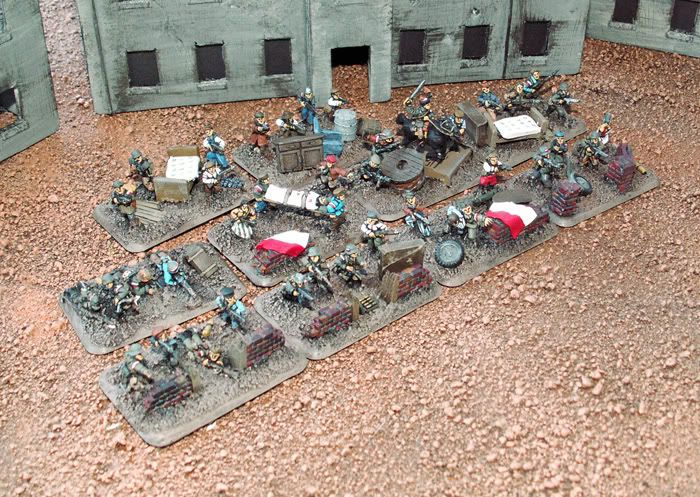
Armia Krajowa II
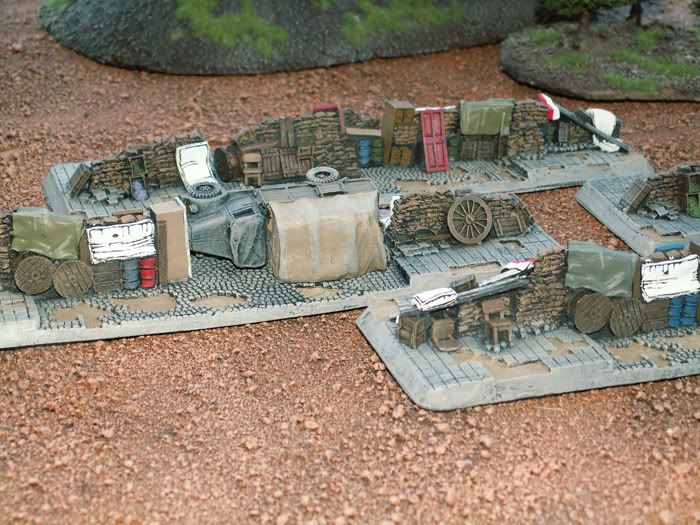
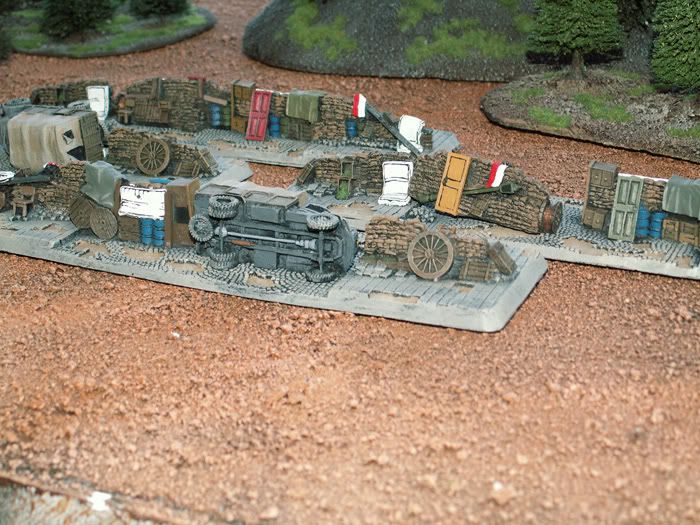
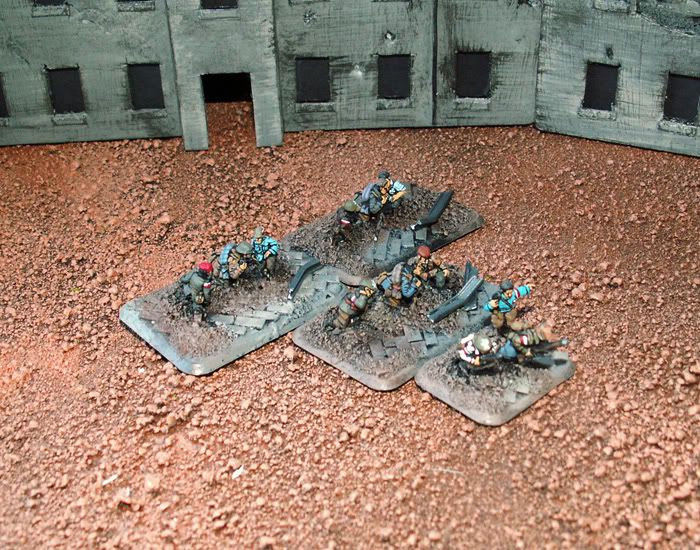
La mezcla y la conversión de figuras ha ayudado a crear un ejército realmente único que representa el espíritu de los resistentes de Varsovia.

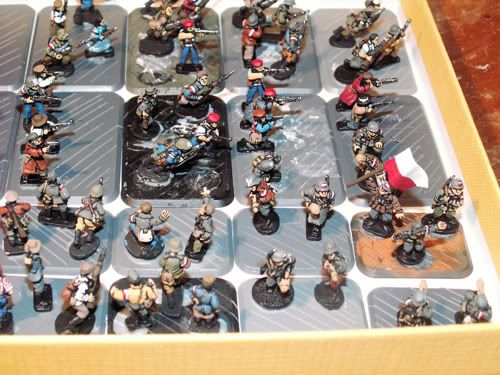
Como iba a necesitar montones de elementos para las peanas he creado copias en resina de algunos que compré (¡sorry por los que tienen copyright!)para poder hacer barricadas y crear peanas con muchísima escenografía
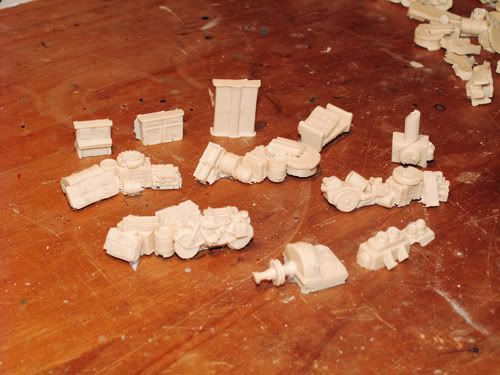


Como iba a necesitar montones de elementos para las peanas he creado copias en resina de algunos que compré (¡sorry por los que tienen copyright!)para poder hacer barricadas y crear peanas con muchísima escenografía

Saturday, June 11, 2011
Armia Krajowa in progress
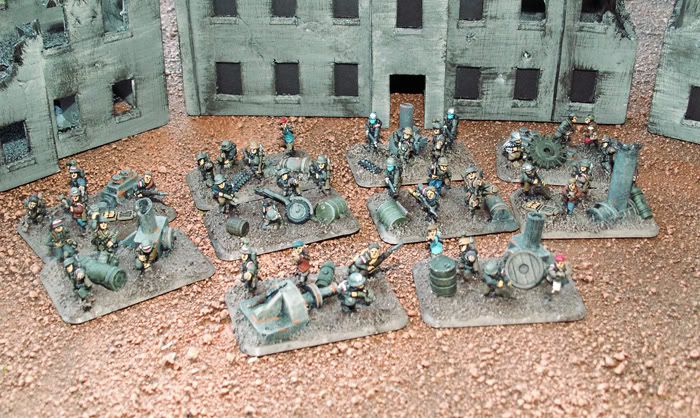
En el verano de 1944 la población de Varsovia se levantó contra la ocupación alemana. Miles de polacos, con muchos judíos en sus filas, que habína estado almacenando armas y explosivos durante meses, ante la proximidad del ejército soviético, atacaron a la guarnición alemana con la esperanza de tomar el control de la ciudad y contar con la ayuda del Ejército Rojo.
Este ejército, formado por civiles, se enfrentó con gran valor contra las fuerzas alemanas, con las que mantuvo 2 meses de heroica resistencia, y fracasó sólo debido a que los soviéticos decicieron no cruzar el Vístula para ayudarles.
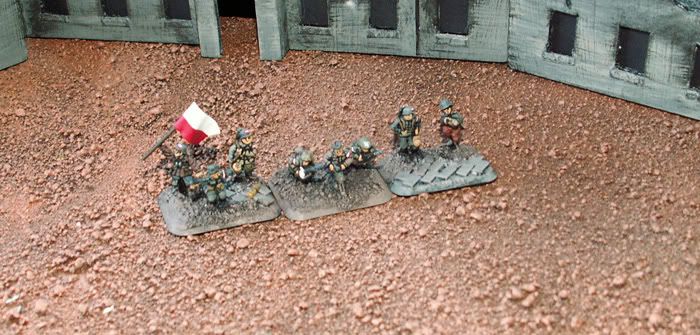
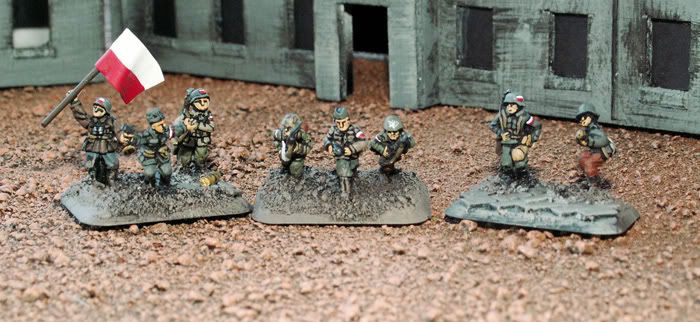
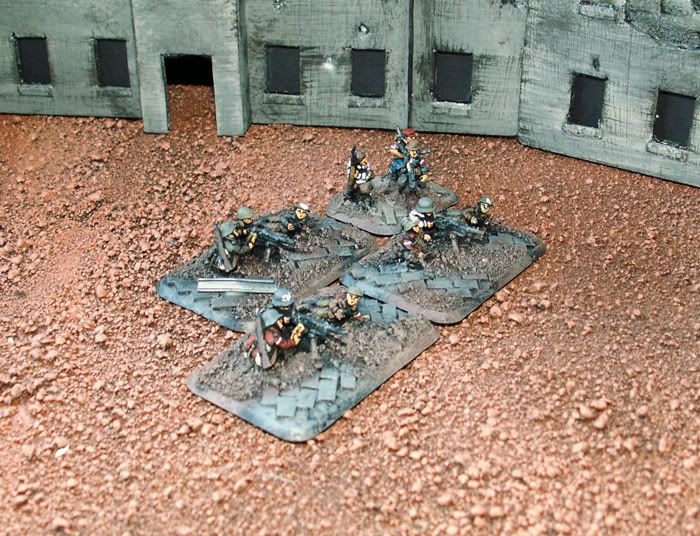
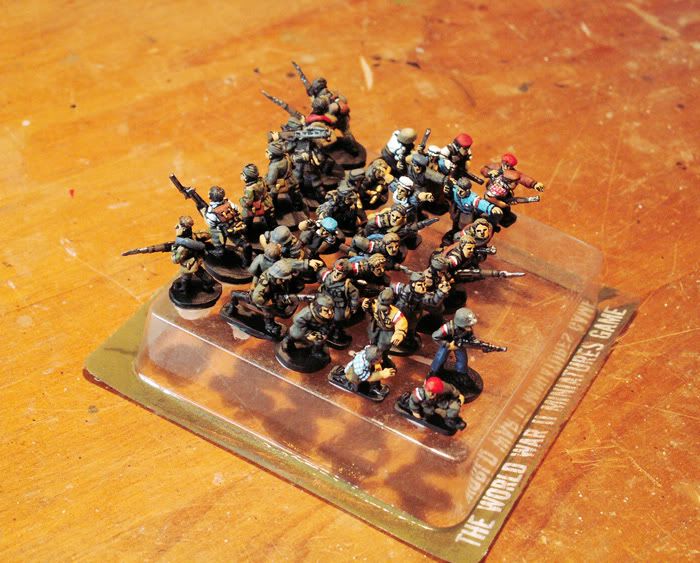
Al haberse formado en la clandestinidad y estar formado por civiles, el Armia Krajowa carecía de uniformes y de equipamiento homogéneo. Las armas eran, fundamentalmente, capturadas o robadas a los alemanes, los explosivos caseros y los uniformes o bien caseros o bien simplemente ropas civiles. El distintivo para identificarse entre ellos era usar brazaletes o marcas blancas y rojas (colores de la bandera polaca) o un águila blanca (del escudo polaco) pintado en el frontal de los cascos.
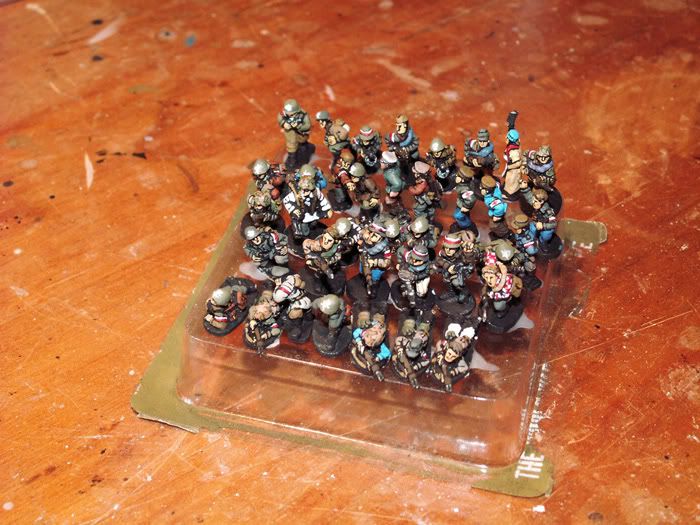
Partiendo de esta base he comenzado a pintar un Armia Krajowa para un cliente, y estoy tratando de darle toda la variedad y vistosidad posible. Estoy pintando uniformes alemanes (verdes, grises y de camuflaje), ropas de civiles (con chaquetas de cuadros y pantalones de rayas incluidos), cascos alemanes capturados y polacos de 1939, cabezas descubiertas... Además de variedad de colores también estoy usando una gran variedad de figuras, pues la mayoría son conversiones, y hay figuras de rumanos, americanos, alemanes, soviéticos, civiles, de la resistencia francesa y húngaros. Así como figuras de Battlefront y Peter Pig, por supuesto.
Pongo un par de fotos para ir viendo como van quedando las miniaturas!
Este ejército, formado por civiles, se enfrentó con gran valor contra las fuerzas alemanas, con las que mantuvo 2 meses de heroica resistencia, y fracasó sólo debido a que los soviéticos decicieron no cruzar el Vístula para ayudarles.
Al haberse formado en la clandestinidad y estar formado por civiles, el Armia Krajowa carecía de uniformes y de equipamiento homogéneo. Las armas eran, fundamentalmente, capturadas o robadas a los alemanes, los explosivos caseros y los uniformes o bien caseros o bien simplemente ropas civiles. El distintivo para identificarse entre ellos era usar brazaletes o marcas blancas y rojas (colores de la bandera polaca) o un águila blanca (del escudo polaco) pintado en el frontal de los cascos.
Partiendo de esta base he comenzado a pintar un Armia Krajowa para un cliente, y estoy tratando de darle toda la variedad y vistosidad posible. Estoy pintando uniformes alemanes (verdes, grises y de camuflaje), ropas de civiles (con chaquetas de cuadros y pantalones de rayas incluidos), cascos alemanes capturados y polacos de 1939, cabezas descubiertas... Además de variedad de colores también estoy usando una gran variedad de figuras, pues la mayoría son conversiones, y hay figuras de rumanos, americanos, alemanes, soviéticos, civiles, de la resistencia francesa y húngaros. Así como figuras de Battlefront y Peter Pig, por supuesto.
Pongo un par de fotos para ir viendo como van quedando las miniaturas!


Monday, June 6, 2011

Wednesday, May 4, 2011
Ejército hindú / Indian army - Xyston Miniatures
Bueno, aquí están las fotos del ejércitu hindú que he pintado, en 15 mm, de Xyston miniatures.
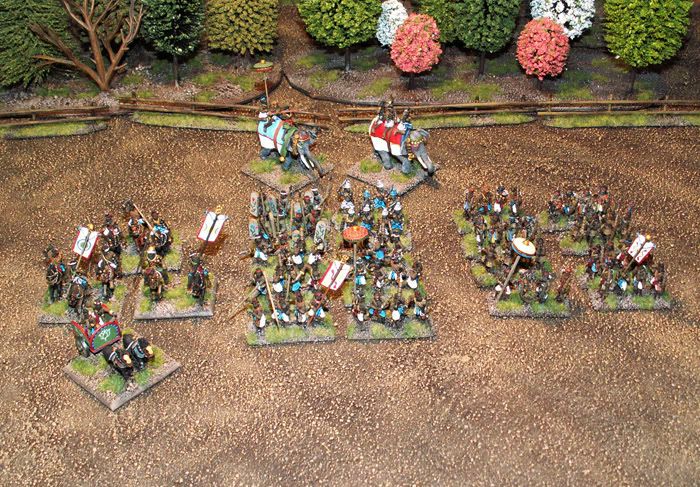
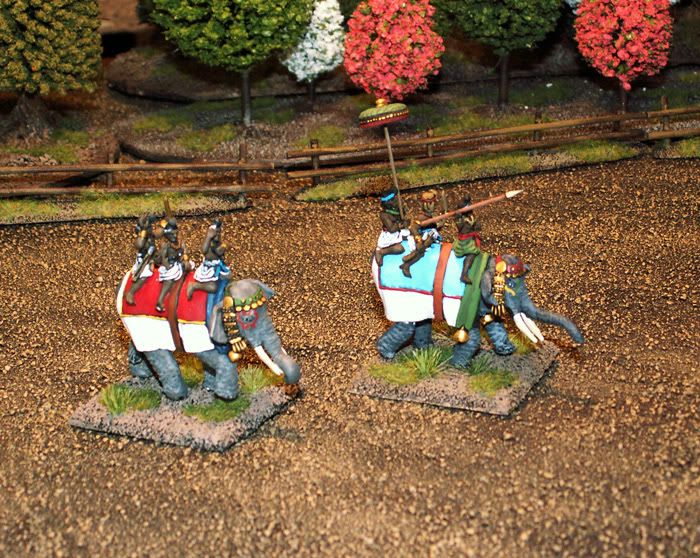
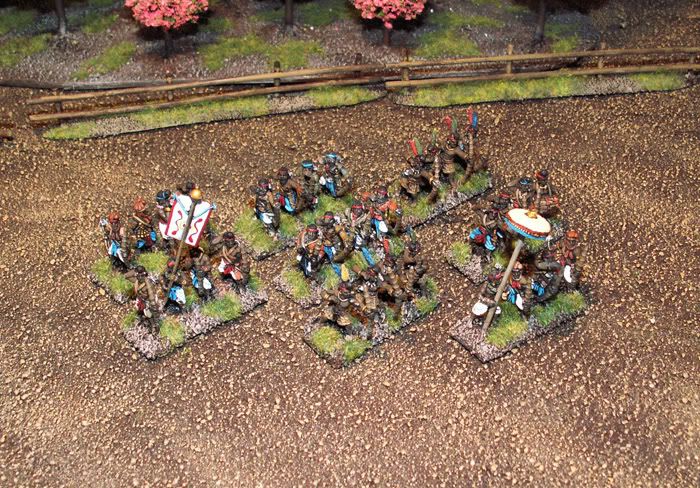
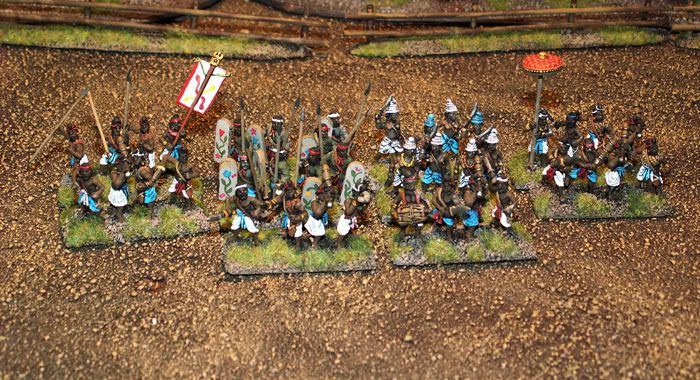
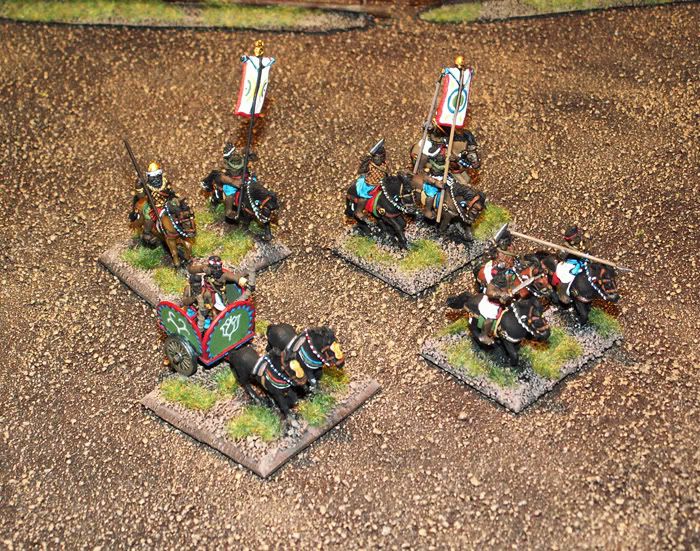
Ha sido un ejército muy cansado de pintar, tiene mil detalles, y había que darle variedad y colorido para mostrar la diversidad y poca homogeneidad de los ejércitos de India en la Antigüedad. Creo que el resutlado ha merecido la pena.


Ha sido un ejército muy cansado de pintar, tiene mil detalles, y había que darle variedad y colorido para mostrar la diversidad y poca homogeneidad de los ejércitos de India en la Antigüedad. Creo que el resutlado ha merecido la pena.
Monday, May 2, 2011
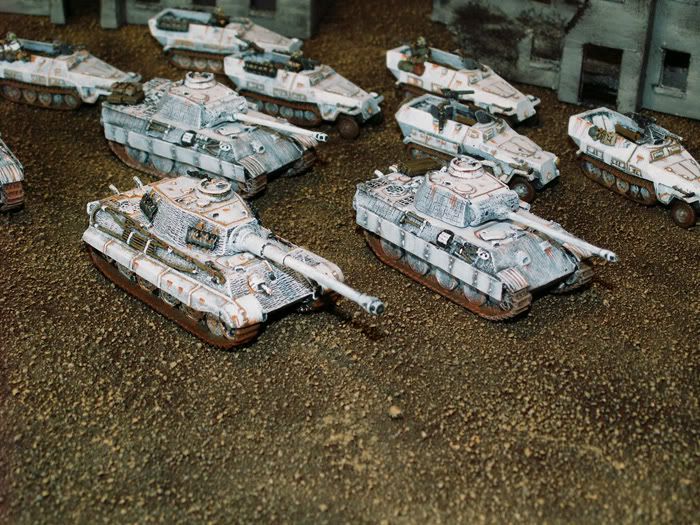
Panzers con cammo invernal
Estos panzers terminé de pintarlos hace poco. Son miniaturas de Flames of War, como de costumbre, a las que les he aplicado un camuflaje invernal con poco esfuerzo.
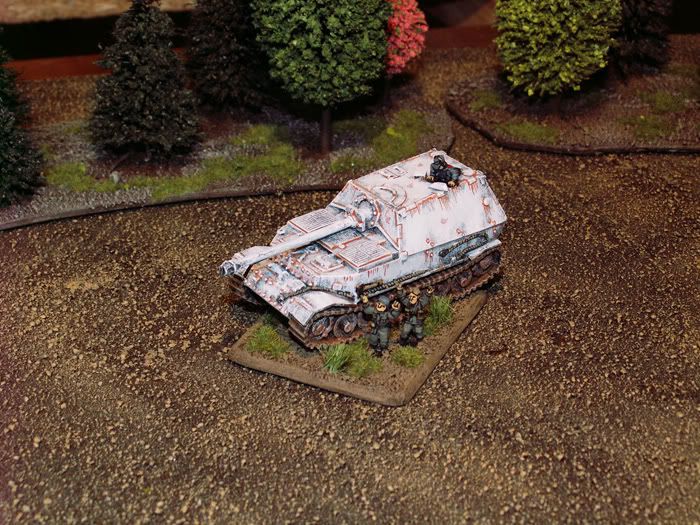
La técnica consiste, básicamente en aplicar varias capas de pincel seco muy ligero sobre la imprimación negra. Una vez que ya se han perfilado las aprtes que sobresalen sobre los recovecos, he ido pintando los planos lisos con un pincel, de forma tradicional.
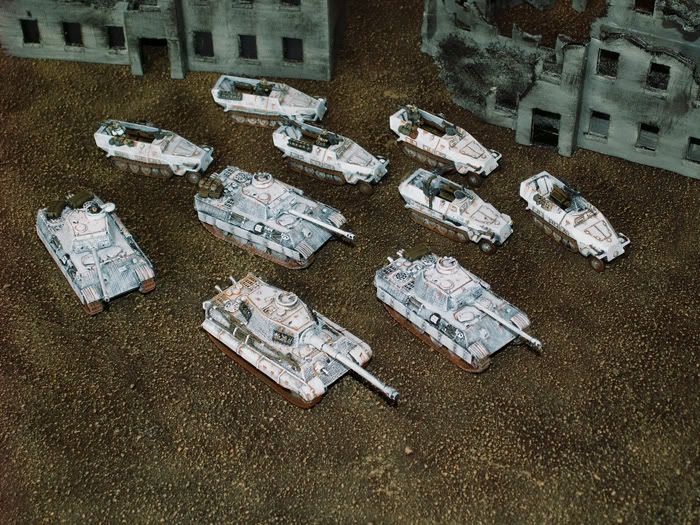
Lo siguiente ha consistido en pintar los chorretones de óxido con "marrón naranja de Vallejo", incidiendo especialmente en las aristas y recovecos, que son lugares tendentes a oxidarse, bien por la acumulación de humedad o porque están expuestas a golpes que hacen saltar la pintura y dejan expuesto el metal de debajo.

Monday, April 25, 2011
Tutorial Indian Pattern Carriers
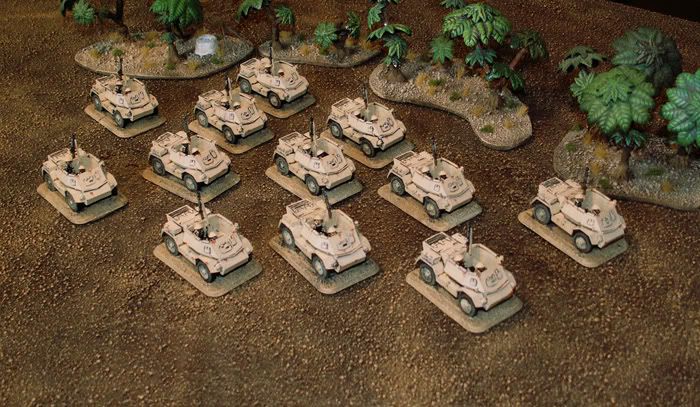
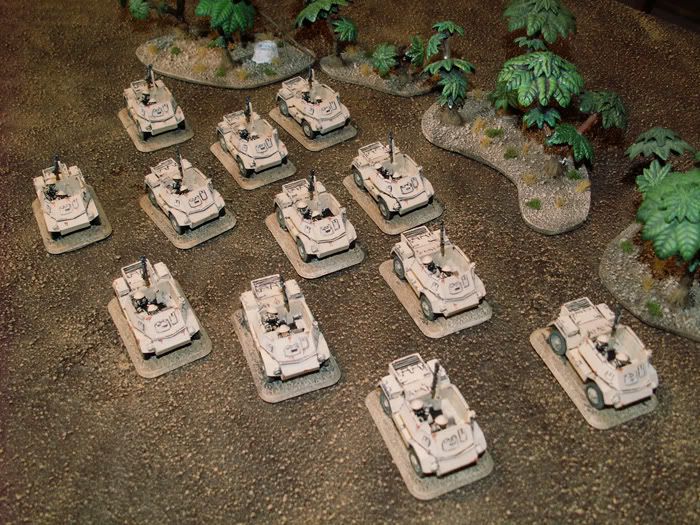
Pues aquí pongo un tuto sobre como he pintado estos vehículos, pintado por encargo.
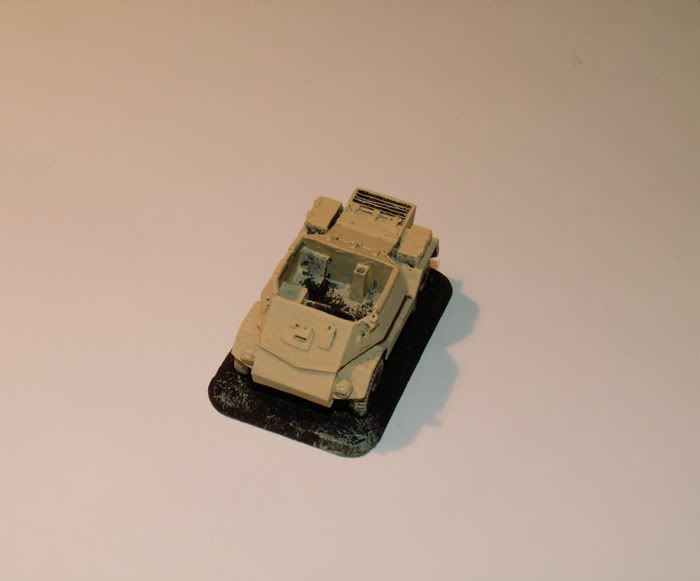
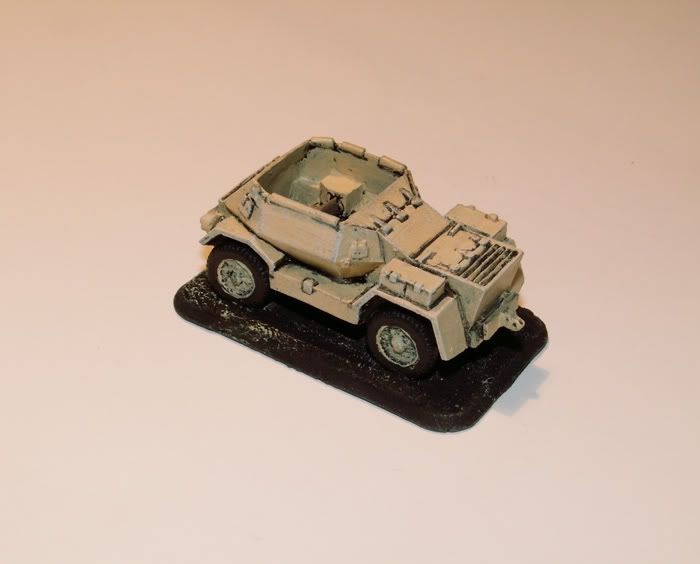
1. Comenzamos imprimando los trastos, si lo imprimáis mejor que yo, sin dejar partes grises visibles, será de agradecer xDD
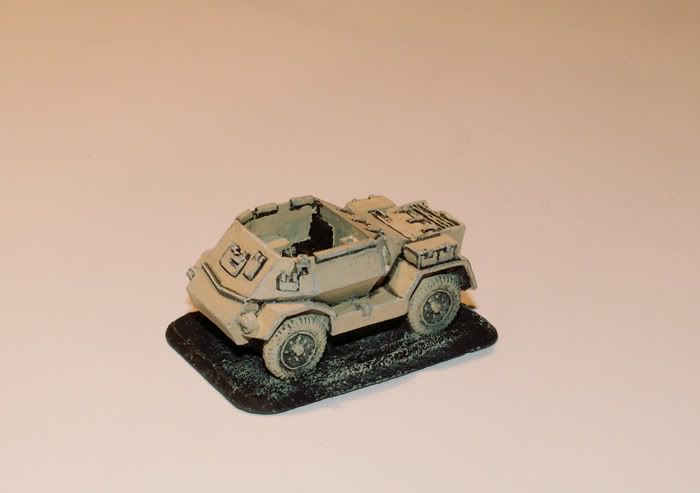
2. Cogemos el Arena Oscura, de Vallejo, una brocha gorda, y comenzamos dar un pincel seco d emala manera. A la izquierda está el resultado del primero, cuando seque damos un segundo, como a la derecha.

3. Los dos primeros pinceles secos habrán creado una “imprimación clarita” sobre el negro, de forma que ya podremos usar un pincel normal para cubrir todo de Arena Oscura. El problema de intentar pintar de “buenas maneras” desde el principio es que el negro es muy negro, y el color tan claro que queremos aplicar no cubrirá bien, por lo que necesitaremos esas dos capas previas para que ya cubra bien.
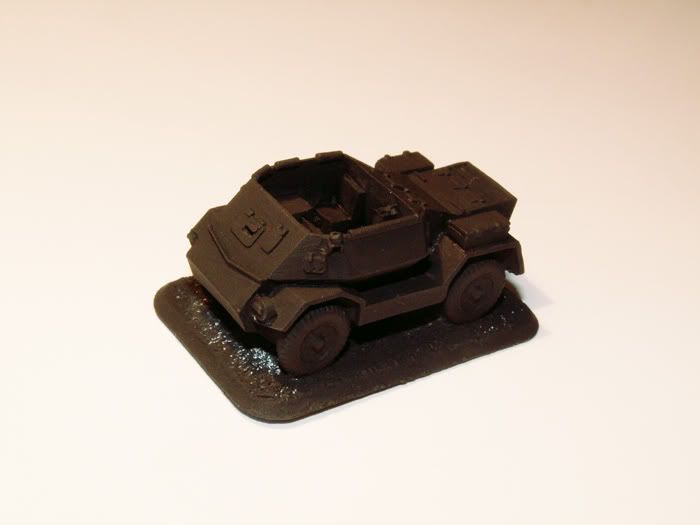
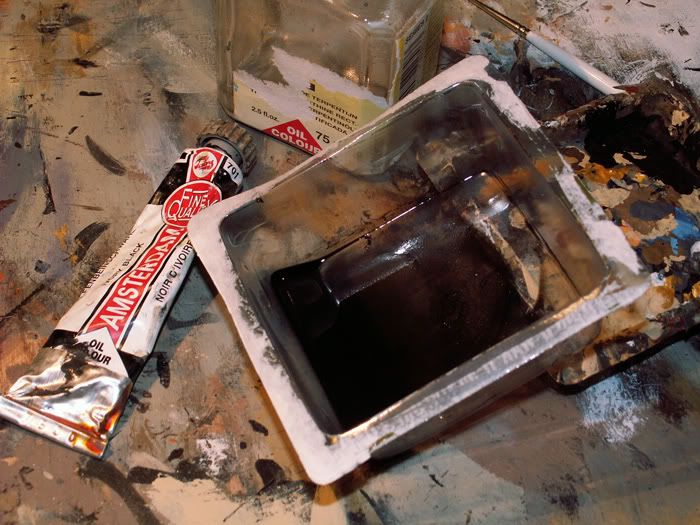
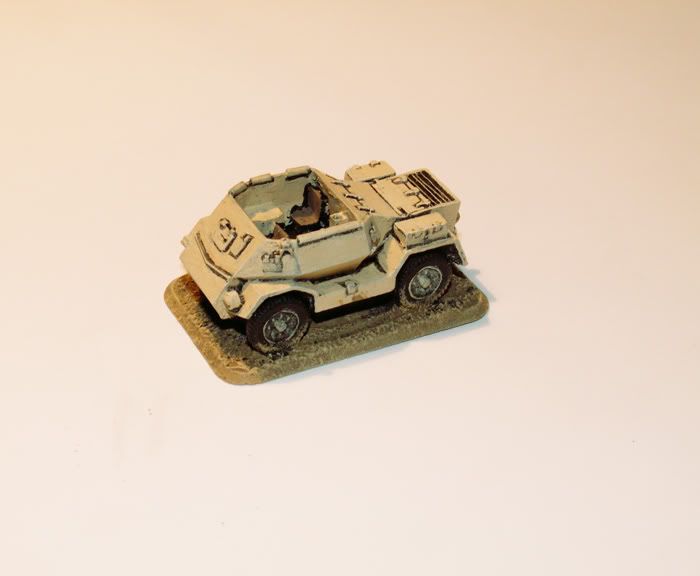
4. Cogemos un recipiente (gallifante para el que adivine de donde ha salido xD ), echamos trementina y un poco de óleo negro y removemos.
5. Ahora vamos aplicando con un pincelito el óleo disuelto por los recovecos y detalles. No importa que nos salgamos, luego habrá que rematar sí o sí.
6. Quedando tal que así tras haber rematado con el tomo del vehículo allá donde nos habremos salido. Un hindú de Mumbay se podrá preguntar por qué perfilamos en negro sobre el tono de arena oscura si tenemos una imprimación negra original que nos podría servir… a lo que el dios Ganesh responderá que este óleo trata de representar esa roña inmunda (sobre todo grasa) que se adhiere en unos vehículos no muy habituados al autolavado, y nada representa mejor la roña que el óleo.
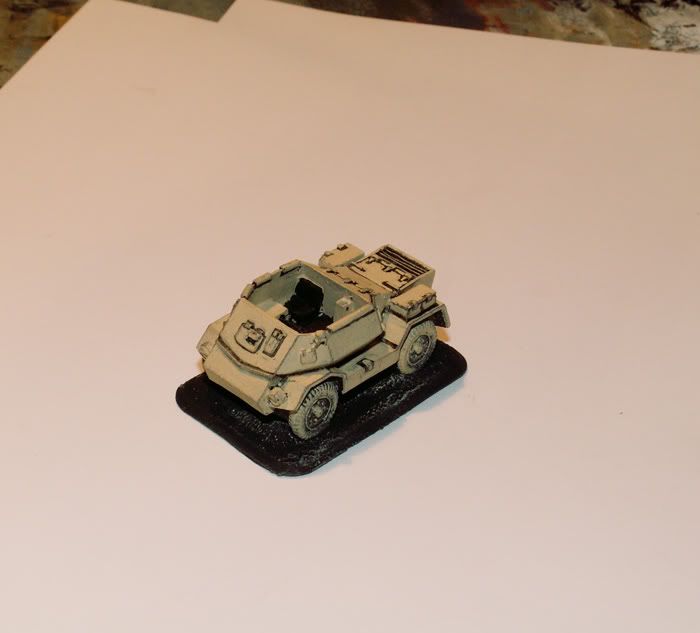
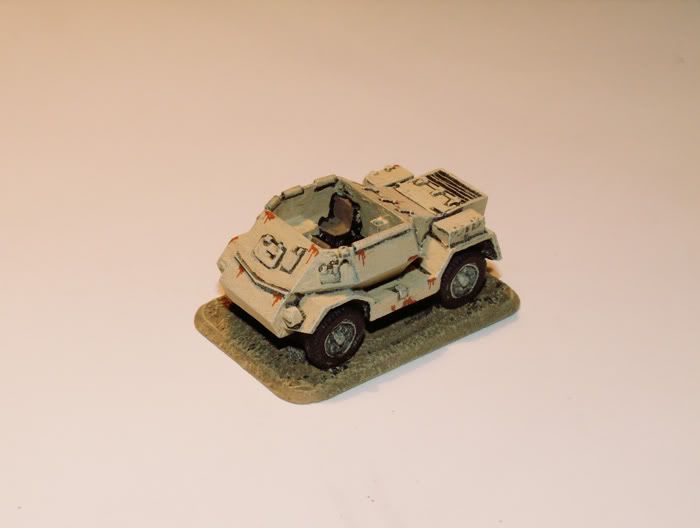
7. Ahora damos un pincel seco, muy seco y breve de gris clarito y luego otro de blanco, a las aristas y planos grandes del vehículo. Esto le dará más roña.
8. Pintamos los asientos interiores y rematamos el interior.
9. Ahora repintamos las ruedas de negro
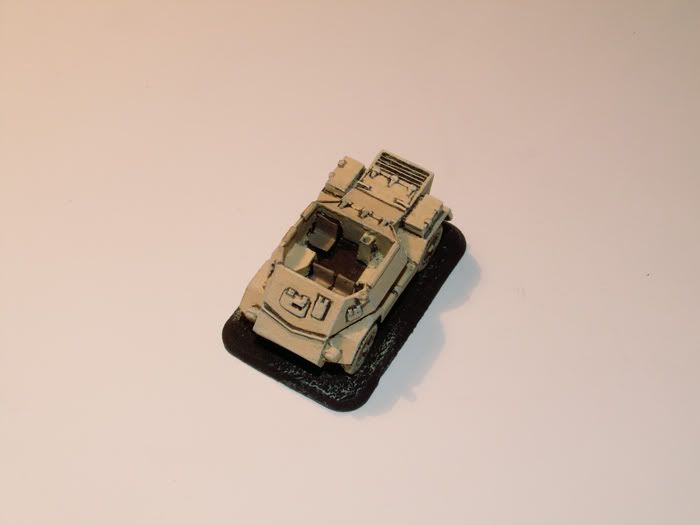
10. Pintamos la peana dando un color tierra (US Field Drab) y la iluminamos con un tono amarillento más clarito que realzará la tierra y le dará un aspecto más seco
11. Cogemos un tono marrón anaranjado (he usado Marrón Medio de Andrea, pero sirve cualquiera parecido) y creamos los desconchones con chorretones de óxido. El norte de África, aunque sea caluroso, tiene el mar muy cerca, y cualquiera sabe como ataca la sal a los metales, así que los vehículos militares sufrían lo suyo el acoso de la sal y la humedad de la brisa marina.
Para pintarlo creamos un manchurrón alargado paralelo a alguna arista, recoveco o lugar fácilmente oxidable, y con la punta del pincel, extendemos hacia abajo un par líneas finas que representarán chorretones de óxido.
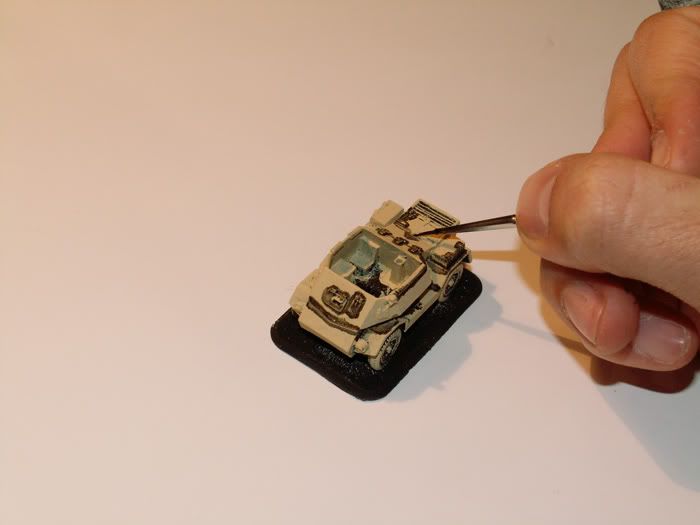
12. Le damos un pincel seco muy ligero a las ruedas para que cojan un poco de vidilla y pegamos a los tripulantes.
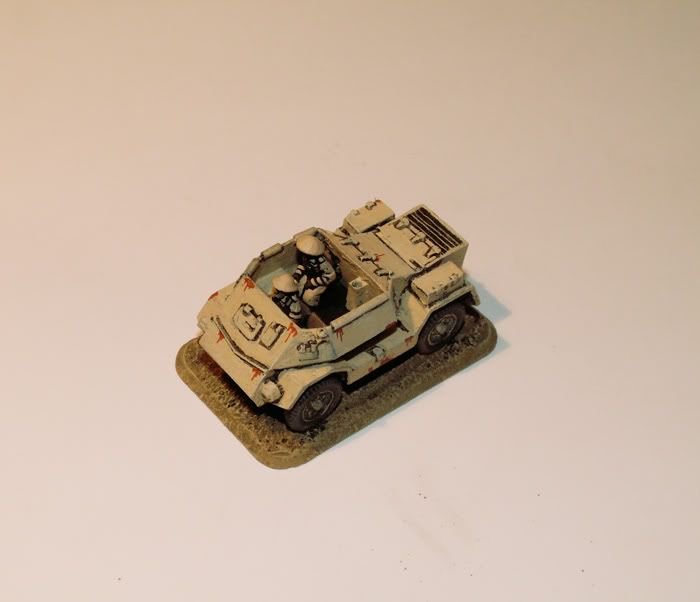
13. Y por últimos pegamos el mástil con la MG AA.
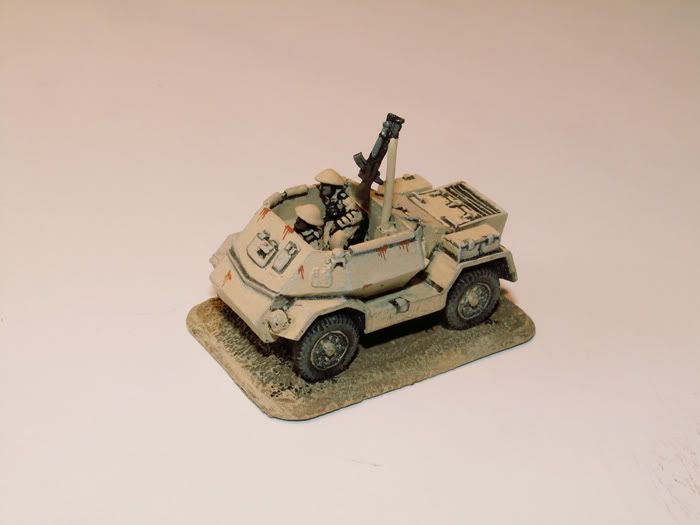
Y así tendremos unos transportes para estos simpáticos guerreros de turbantes y bigotazos xD
1. Comenzamos imprimando los trastos, si lo imprimáis mejor que yo, sin dejar partes grises visibles, será de agradecer xDD

2. Cogemos el Arena Oscura, de Vallejo, una brocha gorda, y comenzamos dar un pincel seco d emala manera. A la izquierda está el resultado del primero, cuando seque damos un segundo, como a la derecha.

3. Los dos primeros pinceles secos habrán creado una “imprimación clarita” sobre el negro, de forma que ya podremos usar un pincel normal para cubrir todo de Arena Oscura. El problema de intentar pintar de “buenas maneras” desde el principio es que el negro es muy negro, y el color tan claro que queremos aplicar no cubrirá bien, por lo que necesitaremos esas dos capas previas para que ya cubra bien.

4. Cogemos un recipiente (gallifante para el que adivine de donde ha salido xD ), echamos trementina y un poco de óleo negro y removemos.

5. Ahora vamos aplicando con un pincelito el óleo disuelto por los recovecos y detalles. No importa que nos salgamos, luego habrá que rematar sí o sí.

6. Quedando tal que así tras haber rematado con el tomo del vehículo allá donde nos habremos salido. Un hindú de Mumbay se podrá preguntar por qué perfilamos en negro sobre el tono de arena oscura si tenemos una imprimación negra original que nos podría servir… a lo que el dios Ganesh responderá que este óleo trata de representar esa roña inmunda (sobre todo grasa) que se adhiere en unos vehículos no muy habituados al autolavado, y nada representa mejor la roña que el óleo.

7. Ahora damos un pincel seco, muy seco y breve de gris clarito y luego otro de blanco, a las aristas y planos grandes del vehículo. Esto le dará más roña.

8. Pintamos los asientos interiores y rematamos el interior.

9. Ahora repintamos las ruedas de negro

10. Pintamos la peana dando un color tierra (US Field Drab) y la iluminamos con un tono amarillento más clarito que realzará la tierra y le dará un aspecto más seco

11. Cogemos un tono marrón anaranjado (he usado Marrón Medio de Andrea, pero sirve cualquiera parecido) y creamos los desconchones con chorretones de óxido. El norte de África, aunque sea caluroso, tiene el mar muy cerca, y cualquiera sabe como ataca la sal a los metales, así que los vehículos militares sufrían lo suyo el acoso de la sal y la humedad de la brisa marina.
Para pintarlo creamos un manchurrón alargado paralelo a alguna arista, recoveco o lugar fácilmente oxidable, y con la punta del pincel, extendemos hacia abajo un par líneas finas que representarán chorretones de óxido.

12. Le damos un pincel seco muy ligero a las ruedas para que cojan un poco de vidilla y pegamos a los tripulantes.

13. Y por últimos pegamos el mástil con la MG AA.

Y así tendremos unos transportes para estos simpáticos guerreros de turbantes y bigotazos xD


Subscribe to:
Posts (Atom)